
Earlier this week, I showed you some before and after shots of my daughter’s bedroom makeover. If you feel like hyperventilating and getting all twitchy, go take a look at those before photos! Yikes!
Today, I thought I’d go into a little more detail with some of the things we switched! One of the biggest changes was removing her gargantuan desk. This was a desk I had picked up free from a neighbor and gave a cute little makeover to a few years prior.

It was a great, solid desk and I loved the way it looked. The size was just better suited for somebody with a 500 sq. ft. office than a young girl’s bedroom. We tried to tuck it into the dormer, but it just filled up the whole space. And once my daughter worked her clutter magic on it, you couldn’t even tell it started out cute!
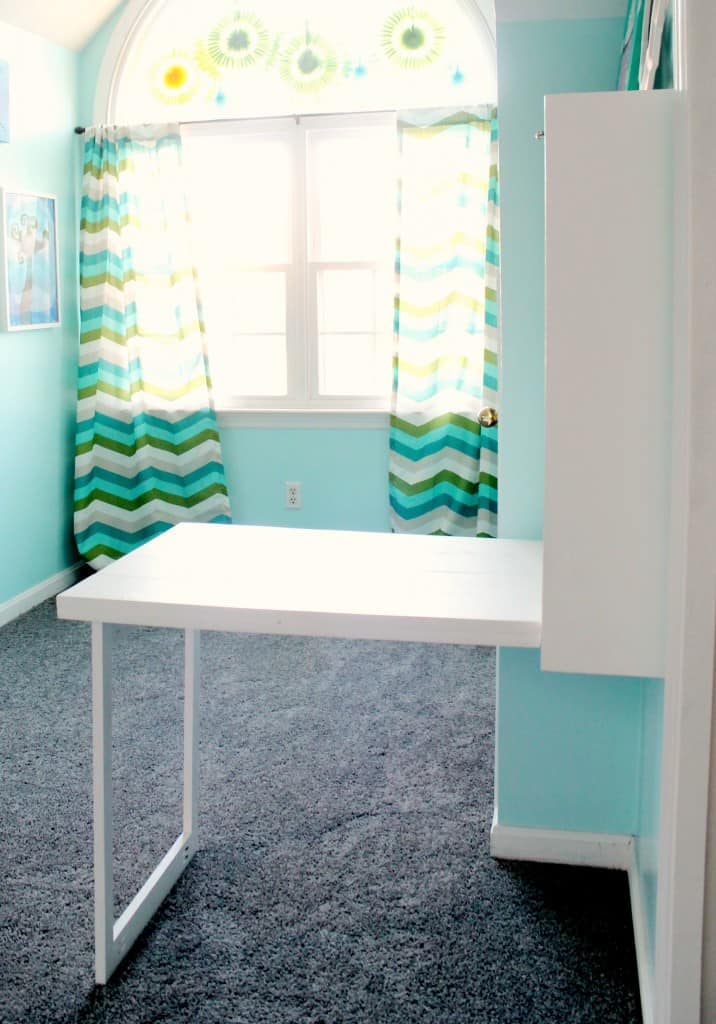
So away the giant desk went and we built her a Murphy desk instead!

We followed Shanty 2 Chic’s plans, and I’m just now noticing that we have very similar wall colors too!

To build the desk surface itself, we used a Kreg Jig to make pocket holes to attach the boards together. I figured if she was leaning on the desk as she’s working, this would just help make it a lot more solid and stable. This photo shows the underside of the desk surface. This is the area that the photo will later cover.

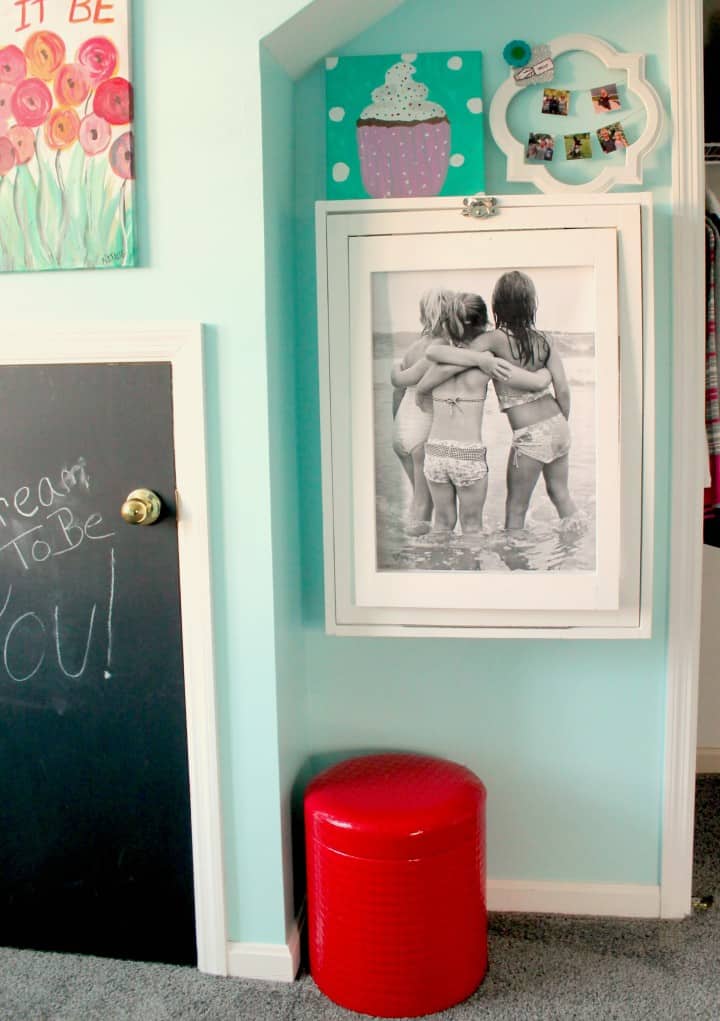
We decided to skip the chalkboard front since the little door right beside her desk was already painted with chalkboard paint. Instead, I took one of my favorite pictures of her and 2 of her cousins and had it blown up at Staples as an engineer print. It cost me a whopping total of $1.70 for this print. Then I just used some 3M strips and stuck it right on. I love how when it’s closed up it looks like a giant picture frame!
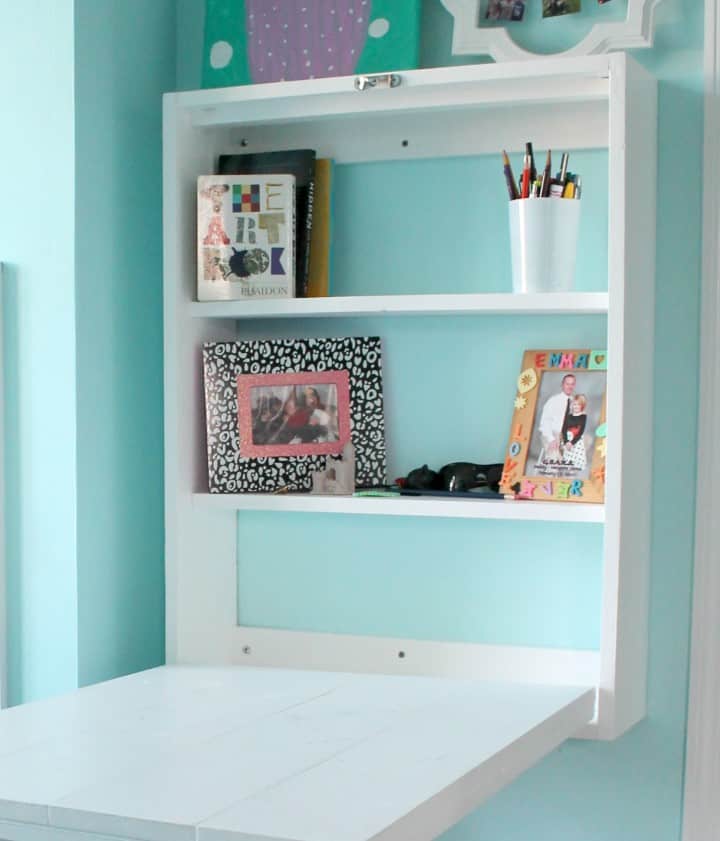
On the inside, we also adjusted the shelves so they were a bit more evenly spaced. I totally get why Shanty 2 Chic spaced theirs the way they did to allow for a container of tall pencils or other items. I’m just more of a symmetry gal and this worked for me visually!
She obviously has less storage space with this desk, but she has plenty for what she needs. The girl needed to throw away about 85% of what she was keeping in her previous desk. Plus, her red stool gives her extra storage beyond just the desk.
I’m just a fan of how much floor space it freed up! Even when it’s open, the room just looks more airy and light!
You will need to buy some specialty hinges and a latch for this project. We purchased ours at our local hardware store, but they are similar to these that you can buy on Amazon:
And just to recap, we went from this:

to this:

(this was probably the stage where her and I were debating which stool
to use, the red or the zebra. I won with the red!)
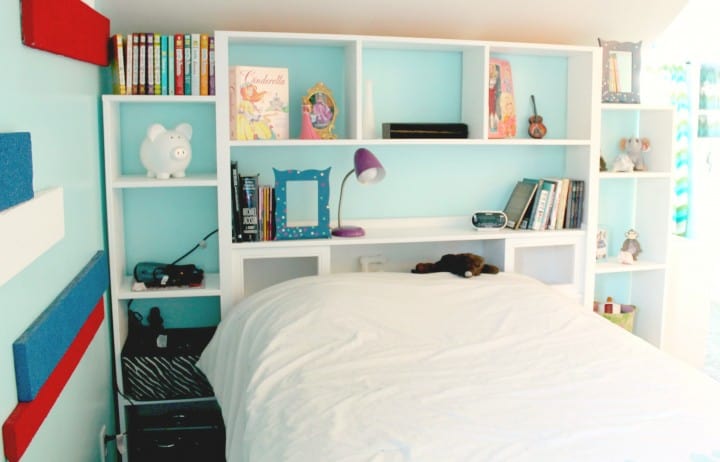
Be sure to check out the rest of her room in this post. You can see how we built her an entire wall unit for her bookshelf out of a thrift store find!
DIY Wall Unit from 80’s Headboard
30 DIY Desk Ideas for Beginners You Can Build Today! - Anika's DIY Life
Saturday 18th of April 2020
[…] DIY Murphy Desk from A Turtles […]
Erin
Saturday 22nd of October 2016
Did you follow Shanty Chic's instructions exactly (minus the chalkboard)? I was wondering what the dimensions of the finished desk surface is - 24"x30"? Do you think it'd be sturdy enough to put in a nursery and used as a changing table?
Natalie
Monday 7th of November 2016
So sorry I'm only replying now! We were vacationing when your comment came through and then it slipped my mind once we returned! We actually sold the desk when we moved this year, so I'm not able to take the exact surface measurements for you. We did follow Shanty to Chic's instructions exactly in terms of measurements. The only thing we switched from their post was the spacing of the shelves inside the frame and we didn't paint it a chalkboard. I think it would be sturdy enough for a changing table, but there isn't really a way to put side rails to prevent your baby from falling off. The side rails wouldn't enable it to close the whole way. For that reason, I probably wouldn't use it for this purpose. Hope you're able to figure something out!
Linda
Monday 8th of February 2016
Love your whole room makeover! We are in the process of going from a very pink little girls room to a turquoise and black tween/teen room with our 11 year old. I love the Murphy desk and the ottoman/chair and the way you framed out a picture on the front of the closed desk. So creative! I will be showing this room to her later after she gets home from school.
Where did you end up getting the red chair? It's such a beautiful contrast with the blues.
Natalie
Wednesday 24th of February 2016
We actually got that for a steal at Hobby Lobby! Thanks so much for the sweet comment and good luck on your makeover!
amy @ one artsy mama
Saturday 6th of February 2016
Looks fantastic!!
carly
Friday 5th of February 2016
What was the total cost of your project? Considering doing this, but I may just buy the $30 one from Ikea. Thanks!
Natalie
Friday 5th of February 2016
Ours cost right around $30, but we already had some of the wood too. So it would be more if you had to buy everything. The specialty hinges are what cost the most. I haven't seen the one from IKEA- is it solid wood?