
I’ve had this thrifted wood hutch that I painted green for probably 7 or 8 years now, but have never posted about it before! Trust me, it didn’t always look so gorgeous, though!

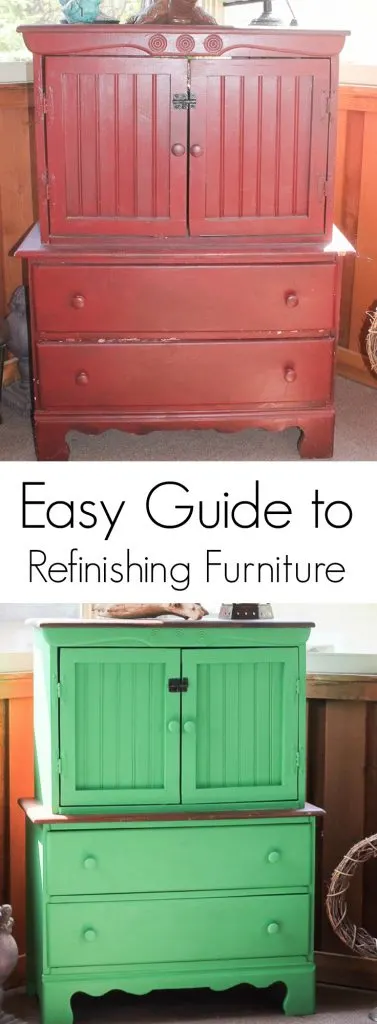
First, it lived like this in our old sunroom for about 3 years before I finally tackled it. When I first bought it for $20 off Craigslist, it was an ugly burgundy color all-over. And chipped. The paint job was so chipped up.


I bough it with the intention of refinishing it immediately, but life and time. Life and time… always getting in the way! When I refinished this curbside couch I found for our old sunroom, I knew it was time to tackle the hutch too.
And I am SO glad that I did and we were able to live with it in this sunroom for a few years before we moved! I loved my pops of blues and greens in this room! Many, many books were enjoyed right here in this spot!

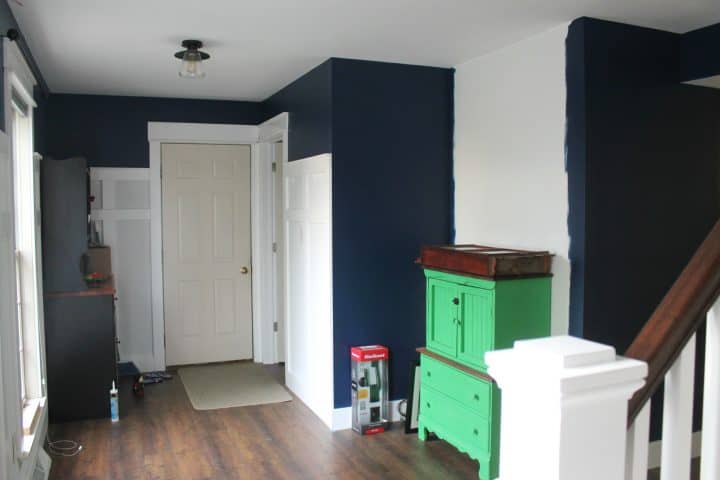
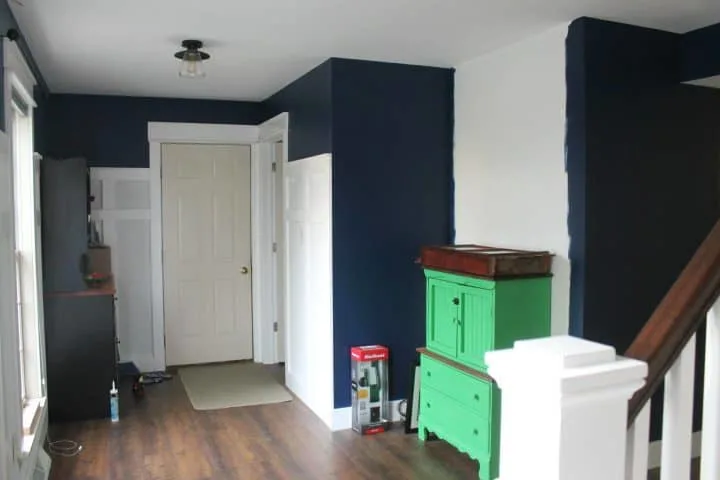
When we moved, I had it in our new entryway/mudroom at this house for a bit. It filled in a spot where our coat bench would eventually go, once it was built. But once I painted the doors green… it had to go. Just too much green and not the same shades. You can see what I mean in the before/after pics of this entryway.
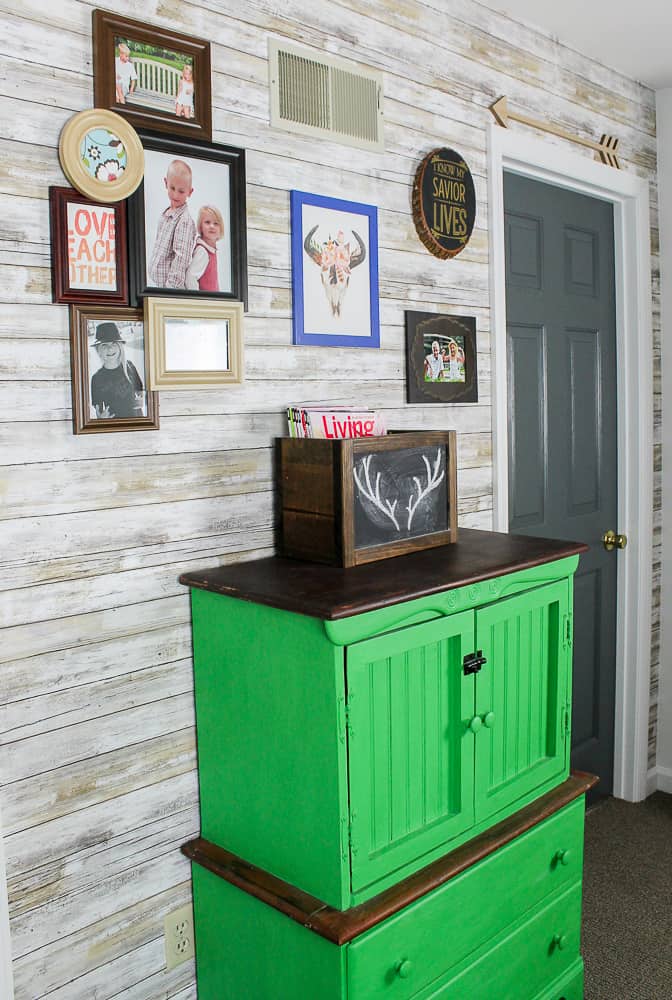
So I moved it to the top of our stairs, and it there it sat for maybe a year. The stairs are right when you walk in the front door (not my favorite place, but I’ve been told I need to just accept this because we’re not moving stairs). So I like that when you glance up, you immediately see a pop of green.


But it was still looking pretty unfinished. Just a blank wall, beige doors and this brightly painted piece of furniture. Nothing felt cohesive until…
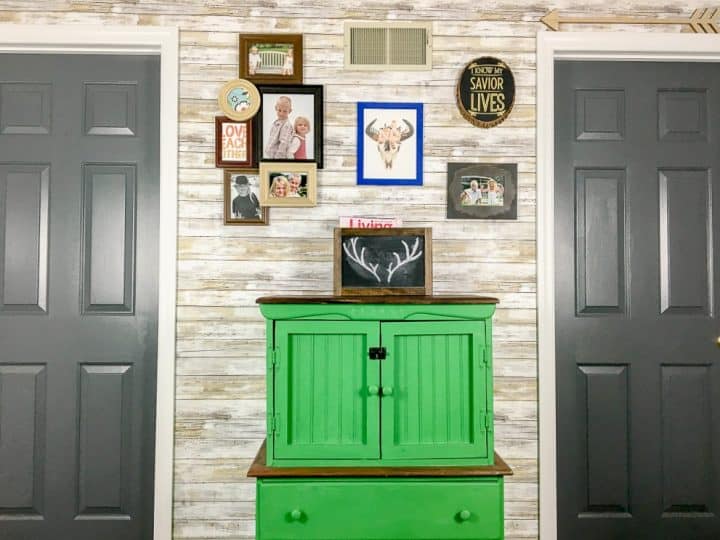

Ahhh. And I can finally relax. After 8 years of owning this piece, I feel like it has finally found it’s home!
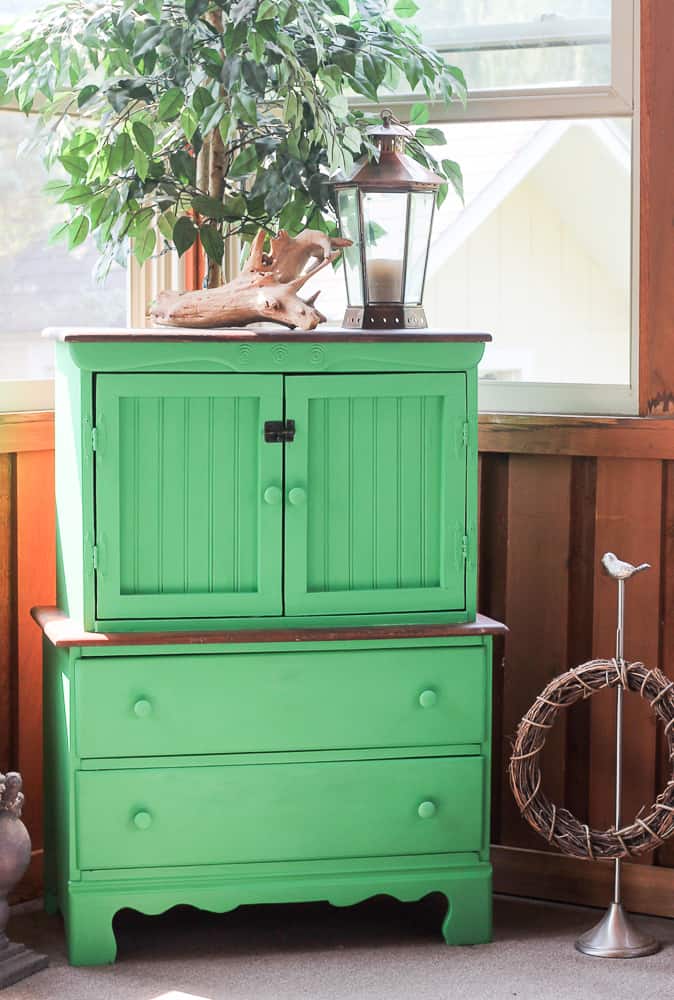
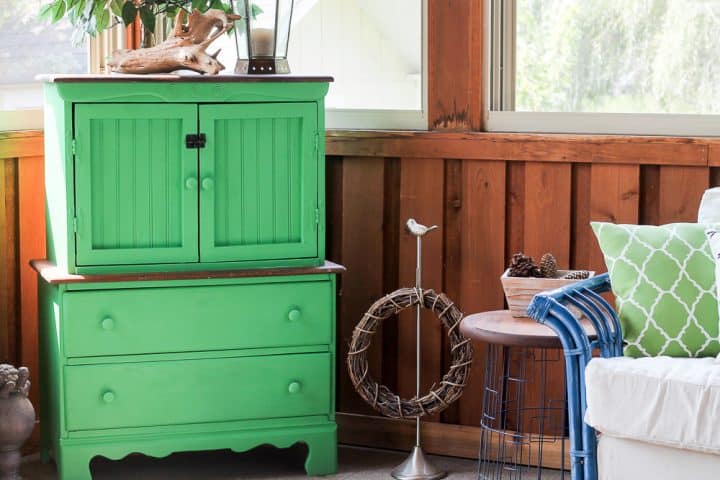
The deep gray doors are the perfect color to off-set the bold green. And I love how the faux plank walls give it a funky pop while still acting as a neutral backdrop. You can see more details on how we created this fun focal point at the top of our stairs in THIS POST.
This space used to be so bland and just ignored. It was merely a way to get to other rooms and no one paid it any attention, but now it just screams personality!


The best part is that everyone sees the vision I had for the green chest to begin with. Before it was just kind of hanging out on its own and I’d get a lot of “Oh, well that’s green” comments that I wasn’t quite sure how to interpret.
Now instead, I get a lot of offers from people who want to buy it off me! Yes, stop by my house for a glass of wine and buy a hutch while you’re at it!
Supplies to Refinish Wood Hutch
Citri-Strip
Plastic Scraper
Palm Sander
Americana Decor Chalky Finish, Fortune
Americana Decor Wax
Paint Brush
Minwax Stain, Dark Walnut
Foam Brush
Directions to Refinish Wood Hutch
- Apply the Citri-Strip very liberally following the directions on the label.
- Once it has sat for the appropriate amount of time, use the plastic scraper to see if it is ready to be removed. Every piece is different (especially thrifted pieces since you aren’t sure how many layers of paint/stain or how long ago they were applied). If it isn’t coming off easily, let it sit for a little longer and then test again.
- My particular hutch had about 7 layers of paint and I don’t know that any of them were applied correctly. There didn’t seem to be any primer used or anything else that gave the paint a more permanent adhesion. This was a huge score for me, because it was literally coming off in huge pieces without much effort at all!


- Once you have all the stain/paint removed, wipe it clean with a lint-free rag. You don’t want any residual Citri-Strip left on the piece or your new paint won’t adhere correctly.
- If necessary, sand any remaining areas smooth. There were some few nooks and crevices where I had to use my mouse sander to get in there really well. Then wipe all of the dust and debris clean again.
- Follow the directions on your paint and begin painting! This was my first time using a chalky finish (I know… I’m slow with trends). It goes on very thickly which is great for coverage, but make sure you smooth out any lines between brush strokes. You have to work semi-fast with this, because I found it dries quicker than normal paint.
- I painted 2 coats on my hutch and only used about half of this small container! I had actually purchased 2 containers and was worried that that wouldn’t be enough. But it goes on so smoothly, that you only need a small amount!

- Once it’s finished, you really should follow it up with a wax to seal it. The chalky paint itself doesn’t have a protective finish, so the paint finish won’t hold up to wetness. It also has a matte, rough feeling to it without the wax. I spread the wax on using a lint-free cloth and following the directions. It didn’t change the color of the paint, but did seem to bring it to life more than the dull finish of the chalky paint.
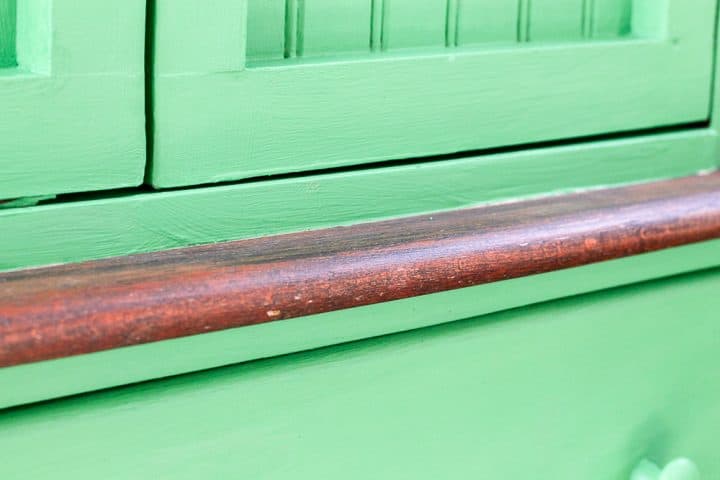
- Once that was dry, I carefully used a small foam brush to stain the top and the middle ledge. I love the way the deep, dark walnut stain looks against the bright green!

I love how it turned out so much, that it makes me want to start scouring Craigslist again for more pieces to work on! It really was such an easy and fun piece!

Allison {a glimpse inside}
Tuesday 10th of October 2017
Love this makeover! Definitely so much better and that green is an awesome shade!
Heidi @Happiness is Homemade
Tuesday 10th of October 2017
This is fantastic! I'm wanting to paint an old piano green, and I think you just showed me the perfect color!