
Last month, I shared the before and after of our front door once I finally got around to adding some color to it. I love the way it looks now (just ask my husband how often I talk about it!). But I still wasn’t thrilled with how you could see right in the windows on the sidelights! I spent an afternoon and created some window cling curtains with Cricut. and now I seriously love the way it looks!

For the past 18 months, you could see right in the sidelights, and with a first floor that is a completely open floor plan… that’s not exactly the best.
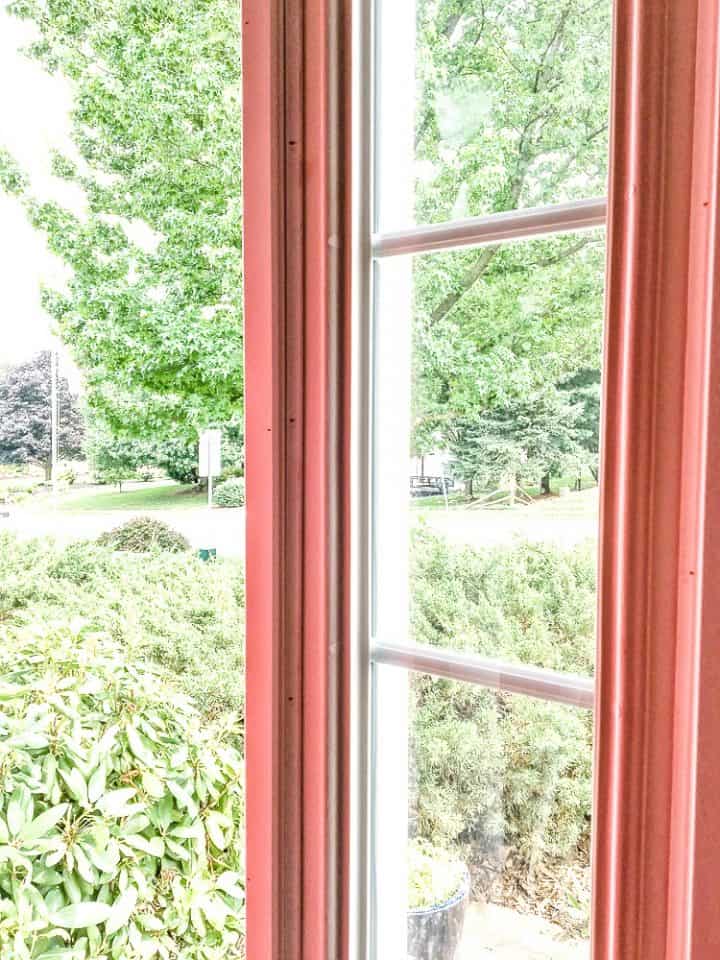
I didn’t want to block the light, because it is very much needed in this entryway. But I wanted to break up the open glass a little bit and provide a hint of privacy. I’m not a fan of the sheer curtains that you usually see over sidelights, and again… the whole light issue!
I’ve had a lot of readers and friends ask me if the Cricut is worth the purchase price. I’ve heard so many times, “It looks really cool, and I want it. I just don’t know if I’d use it enough for how much it costs.”
I hear you loud and clear. Honestly.
I very rarely spend money on things like this that are “just for crafts”. But I bought my 1st Cricut in 2012, and I’ve never looked back. I’m also here to tell you… it is NOT just for crafts! I have saved money by making gifts, helping teachers with bulletin boards and file folders, and to decorate our house!
I could easily have paid $40+ for rods and curtains (that I didn’t even like) to cover these sidelights.

But instead, I used my Cricut to cut some window cling into a pattern that I love!

There are so many instances where I normally would have gone out and paid money for something, but instead I make it with my Cricut. Not just saving money, but getting to actually design it the way I like!
Window Cling Curtains with Cricut
Supplies:
Directions:
- The design I used is a Make It Now project (etched succulent box). Select the design and in the bottom right corner, select “customize”. This will allow you to change the dimensions to the exact size of your sidelights.

2. This design comes with 4 separate panels to cut: the 2 ends and the 2 sides. You only need one long side to create a sidelight. The other side and the 2 short ends can both be deleted.
3. Select the remaining long section and set the measurements you need. You most likely will have an image that is too large for the Cricut to cut. Mine was 36″ long and the maximum a Cricut can cut is 23.5″.
4. To make sure my design stayed continuous, even though it would be cut in 2 pieces because of the length, I had to splice it. I clicked on “insert shape” and selected the square. Unlock the square by clicking on the lock icon on the lower left corner of the square. Drag it to enlarge it to cover about half of your image. I wanted the cut-off point to be at a horizontal line so that is where I enlarged my square to stop.

5. Next you need to hold your control key down and select the square layer and the welded image layer from your right-hand side bar. Once they are both selected, you can hit the “slice” button under layers.
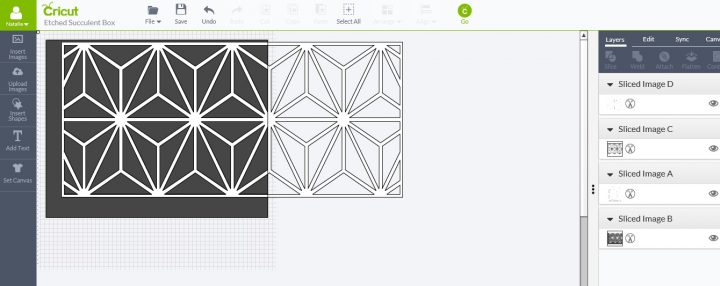
6. You can delete the layer that was the black rectangle (for me it was Sliced Image B). You will be left with the image you want to cut, but it will be sliced into 2 separate pieces.

7. Change your blade dial on the machine to custom and then change the cut settings to “window cling” in your design space software (click on the green profile icon and then “manage custom settings”). Then follow the normal directions for cutting! If you need a refresher, be sure to check out my Cricut 101 for all the basics on how to cut.

I love the geometric design! It fits perfectly into my space, and I was pretty tickled to find a Make It Now project so I didn’t have to actually design anything! That works perfectly for my schedule!
Just look how clean those intricate cuts are!

Not bad for only the $8 cost of the window cling! And if geometric isn’t your shtick, there are so many other patterns available! Or you can create your own design!

So many possibilities, but I promise, from party supplies to artwork to home decor… you will find SO many uses for your Cricut that you’ll be asking yourself why it doesn’t cost more money! Knowing now how often I use it, I would buy it a hundred times over without any hesitation… says the most frugal person you will ever meet!

This is a sponsored conversation written by me on behalf of Cricut. The opinions and text are all mine.
Heather Powers (aka Ms. Frugaluxurious)
Thursday 13th of July 2017
Really lovely - it looks great! Would you elaborate on the ability for people to see into your place? Clearly this isn't opaque, but perhaps it makes it very difficult to see exactly what is happening unless you are right up close?
The red of your door is just magnificent!
Natalie
Thursday 13th of July 2017
Thanks! With the design I chose, I wasn't going for total privacy since I still wanted the sunlight to come through (and I'm nosy!). It very much breaks up the line of site, though, and makes it appear harder to see through. You could absolutely pick a more solid design that would very much provide privacy. There are different colors and finishes to the Cricut window cling depending on how see-through you want it to be. Here's an example of someone who cut a design more for privacy than I did: https://www.pinterest.com/pin/199425089719784072/
And thanks for the compliments on the door! I just painted that last month and love it! Here are some before/afters on it: https://www.aturtleslifeforme.com/2017/06/color-paint-shutters-front-door.html